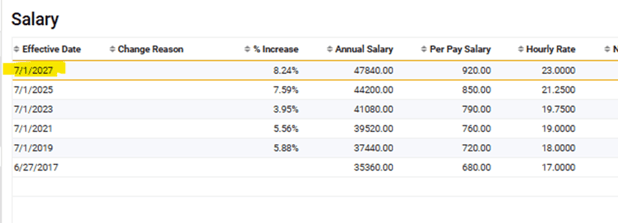
Here are step-by-step instructions on how to update an employee's rate of pay in isolved:
-
Log into isolved at https://whirks.myisolved.com.
-
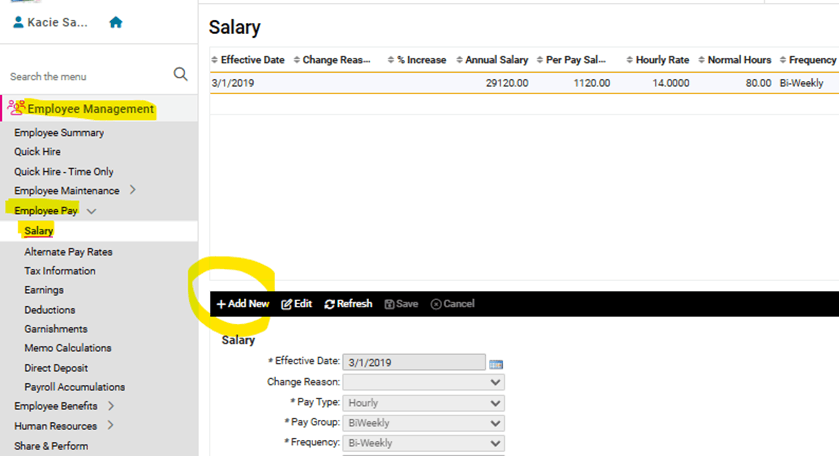
Go to EMPLOYEE MANAGEMENT > Employee Pay > Salary.
-
Click Add New in the black bar.
NOTE: At Whirks, we recommend that you add a new salary record each time an employee's pay rate changes, rather than edit the existing record. The primary reason is because it will build a historical record for you at the top of this screen which will allow for easy review when needed. Additionally, new records have the ability to be set for a future effective date, ensuring that a promised pay increase is not accidentally missed.
4. The Record Type will default to "Current Change," and the Effective Date will default to the first day of your current pay period. This date can be modified, but please see the "What Else Should I Know?" section below if the rate change should take place in the middle of a pay period.
5. Use the drop-down menu to enter a Change Reason (optional).
6. Enter information into one of the four rate fields at the bottom (Percent Increase, Annual Salary, Per Pay Salary, or Hourly Rate).
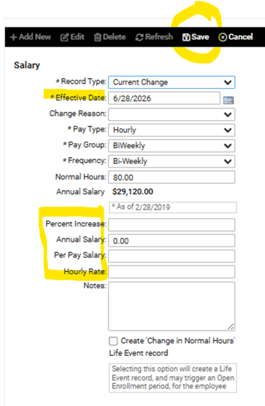
7. Press the Tab button on your keyboard. All other rate fields will auto-fill with equivalent values. This is informational only and should not be changed.
8. Enter any Notes as applicable (optional).
9. The Create 'Change in Normal Hours' Life Event Record box can be left unchecked, since this is a rate change, and not a change to the Normal Hours.
10. Click Save in the black bar.
The new Per Pay Salary or Hourly Rate will be reflected in the Rate column on your Time Entry Grid.
 What Else Should I Know?
-
To change an employee from Hourly to Salary, follow the steps above, but be sure to also update the Pay Type field accordingly.
-
If the employee's rate change should take effect in the middle of a pay period, you will still enter a Current Change record with the appropriate Effective Date, but the system will apply the new hourly rate (or per pay salary) to the FULL pay period. In order to apply the old rate to hours worked prior to the Effective Date, you will need to enter a separate line entry on the Time Entry Grid to override the new rate. It is best to reach out to your Client Success Specialist for instructions on how to complete this step to ensure the employee is not over- or under-paid.
-
New Salary records can be entered in advance with the Record Type of "Future Change." The Effective Date can be set as far into the future as you wish, and you can simply follow all steps listed above. Although you will see the new Salary record listed at the top of the employee's Salary screen, the new hourly rate (or per pay salary) will not be applied until the Effective Date entered is within the current pay period.